In Action: For All of Life
For our Thanksgiving service this last weekend, we incorporated a few choir numbers. One of the numbers was the song For All of Life by Ruth Elain Schram. It's a touching number about, well, life. I was asked to build a presentation to go with the song as it was sung. I decided to go with a scrapbook motive. Below is video rendering of the presentation. I've overlaid an audio file of the song (not our choir) so you can hear how the song matched up with the presentation as it was sung by the choir.
Timing the slides for this presentation was fairly straight forward. Each slide represents approximately two measure of the song. This made it easy to identify what content should go on each slide so that the pictures corelated with the lyrics. It was then just a matter of setting the length of the slide show to a specified time which then automatically divided up the time equally amoung all slides.
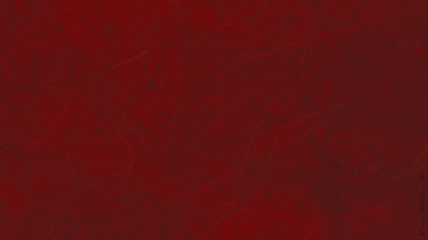
For the background, I took an old texture that I've had laying around for awhile,

then adjusted its hue to give it a new life:
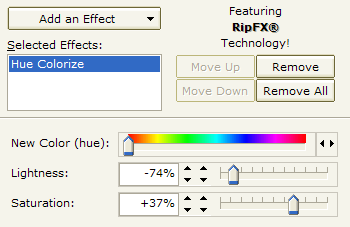
I used SSP's Hue Colorize effect using these settings:
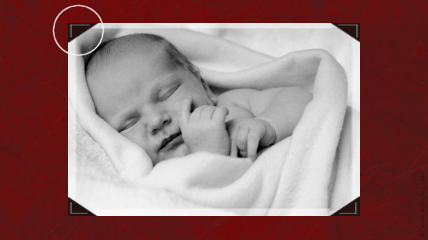
For the cover page, I simply added a black rectangle behind the text and added a Transparency effect at 75%. The text itself is enhanced using the Bevel effect which gives it an embossed look with an upper-left light source.

On the recommendation of my wife, all of the pictures were given a black-and-white appearance, which helped give the presentation a more consistent feel. This was easily accomplished by inserting the Grayscale effect. In testing the presentation on the church projection system, however, it was apparent that the grayscale images looked a bit washed out. To fix this, I went through and adjusted the Contrast for all of the images. In some cases, I used the Emphasis Light and Dark Colors option, but in some cases, it was more appropriate to emphasize only light or only dark colors.
Then as a final touch, to help emphasize the "scrapbook" feel, I added tabs to each of the images just like you would use in a real scrapbook to hold the pictures in place.
This was accomplished by using the Image Overlay effect. To do this, I first created a 256x256 image in a paint program. It looks like this:
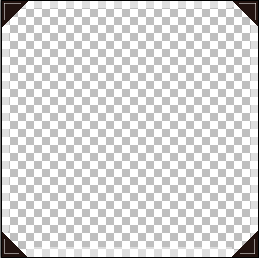
You'll notice that most of the image is transparent. I drew simple tabs in the corners, then placed a semi-transparent white border around the image for a bit of a frame.
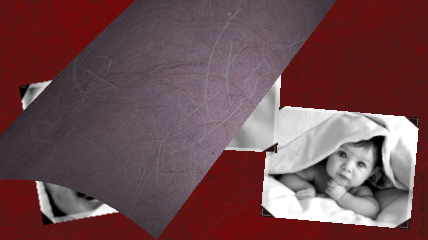
Finally, I used a Page Out transition. Typically, this transition places a mirror copy of the foreground on the back of the page. This characteristic tends to break the illusion of a page in this case. Here is a screen shot showing the Page Out transition using its default properties:

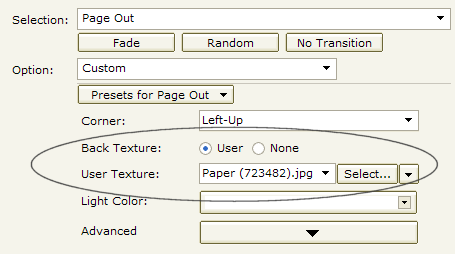
Fortunately, the Page Turn transition lets me specify an image to use for the back of the page, the Back Texture. I simply selected the same image texture that I was also using for the background.
Using this setting, I now get a transition that looks like this:
The images in this presentation were acquired from iStockPhoto.com:
000000098965 000000518699 000000815240 000001110947 000001115183 000001420345 000001791747 000002058165 000002119139 000002342243 000002392702 000003158746 000004030571 000004240119 000004392566 000004732242 000004879391 000005163404 000005327597 000005348919 000005363353 000005369908 000005390683 000005745298 000005782907 000005792999 000005863856 000005998419 000006048019 000006303886 000006310923 000006375742 000006387294 000006453694 000006477746 000006496189 000006562098 000006581392 000006670172 000006694307 000006766679 000006781428 000006793299 000006815588 000006875001 000006889711 000006980447 000007038655 000007048002 000007062383 000007062867 000007228244 000007294335 000007321790 000007431736 000007752899
(BE169)